UBMP4 – Start learning. Keep learning.
UBMP4 is an inexpensive microcontroller development board for anyone.
UBMP4 (USB-based Beginner Multifunction Project, version 4) is a simple, versatile microcontroller development board that’s ideal for anyone learning or teaching microcontroller programming and electronic interfacing.
We created UBMP4 specifically to help high school students learn electronics and microcontroller programming while using it to build a variety of unique and different projects. It’s the fourth major revision of a design that has been proven and refined in classrooms for over five years! Find out more about what makes UBMP4 so special:
UBMP4 is designed for beginners
All of the circuits and I/O devices commonly used to start learning microcontroller programming are on-board. UBMP4’s built-in circuits and microcontroller enable beginners to focus on learning fundamental programming skills quickly, without having to assemble and debug breadboard circuits first.
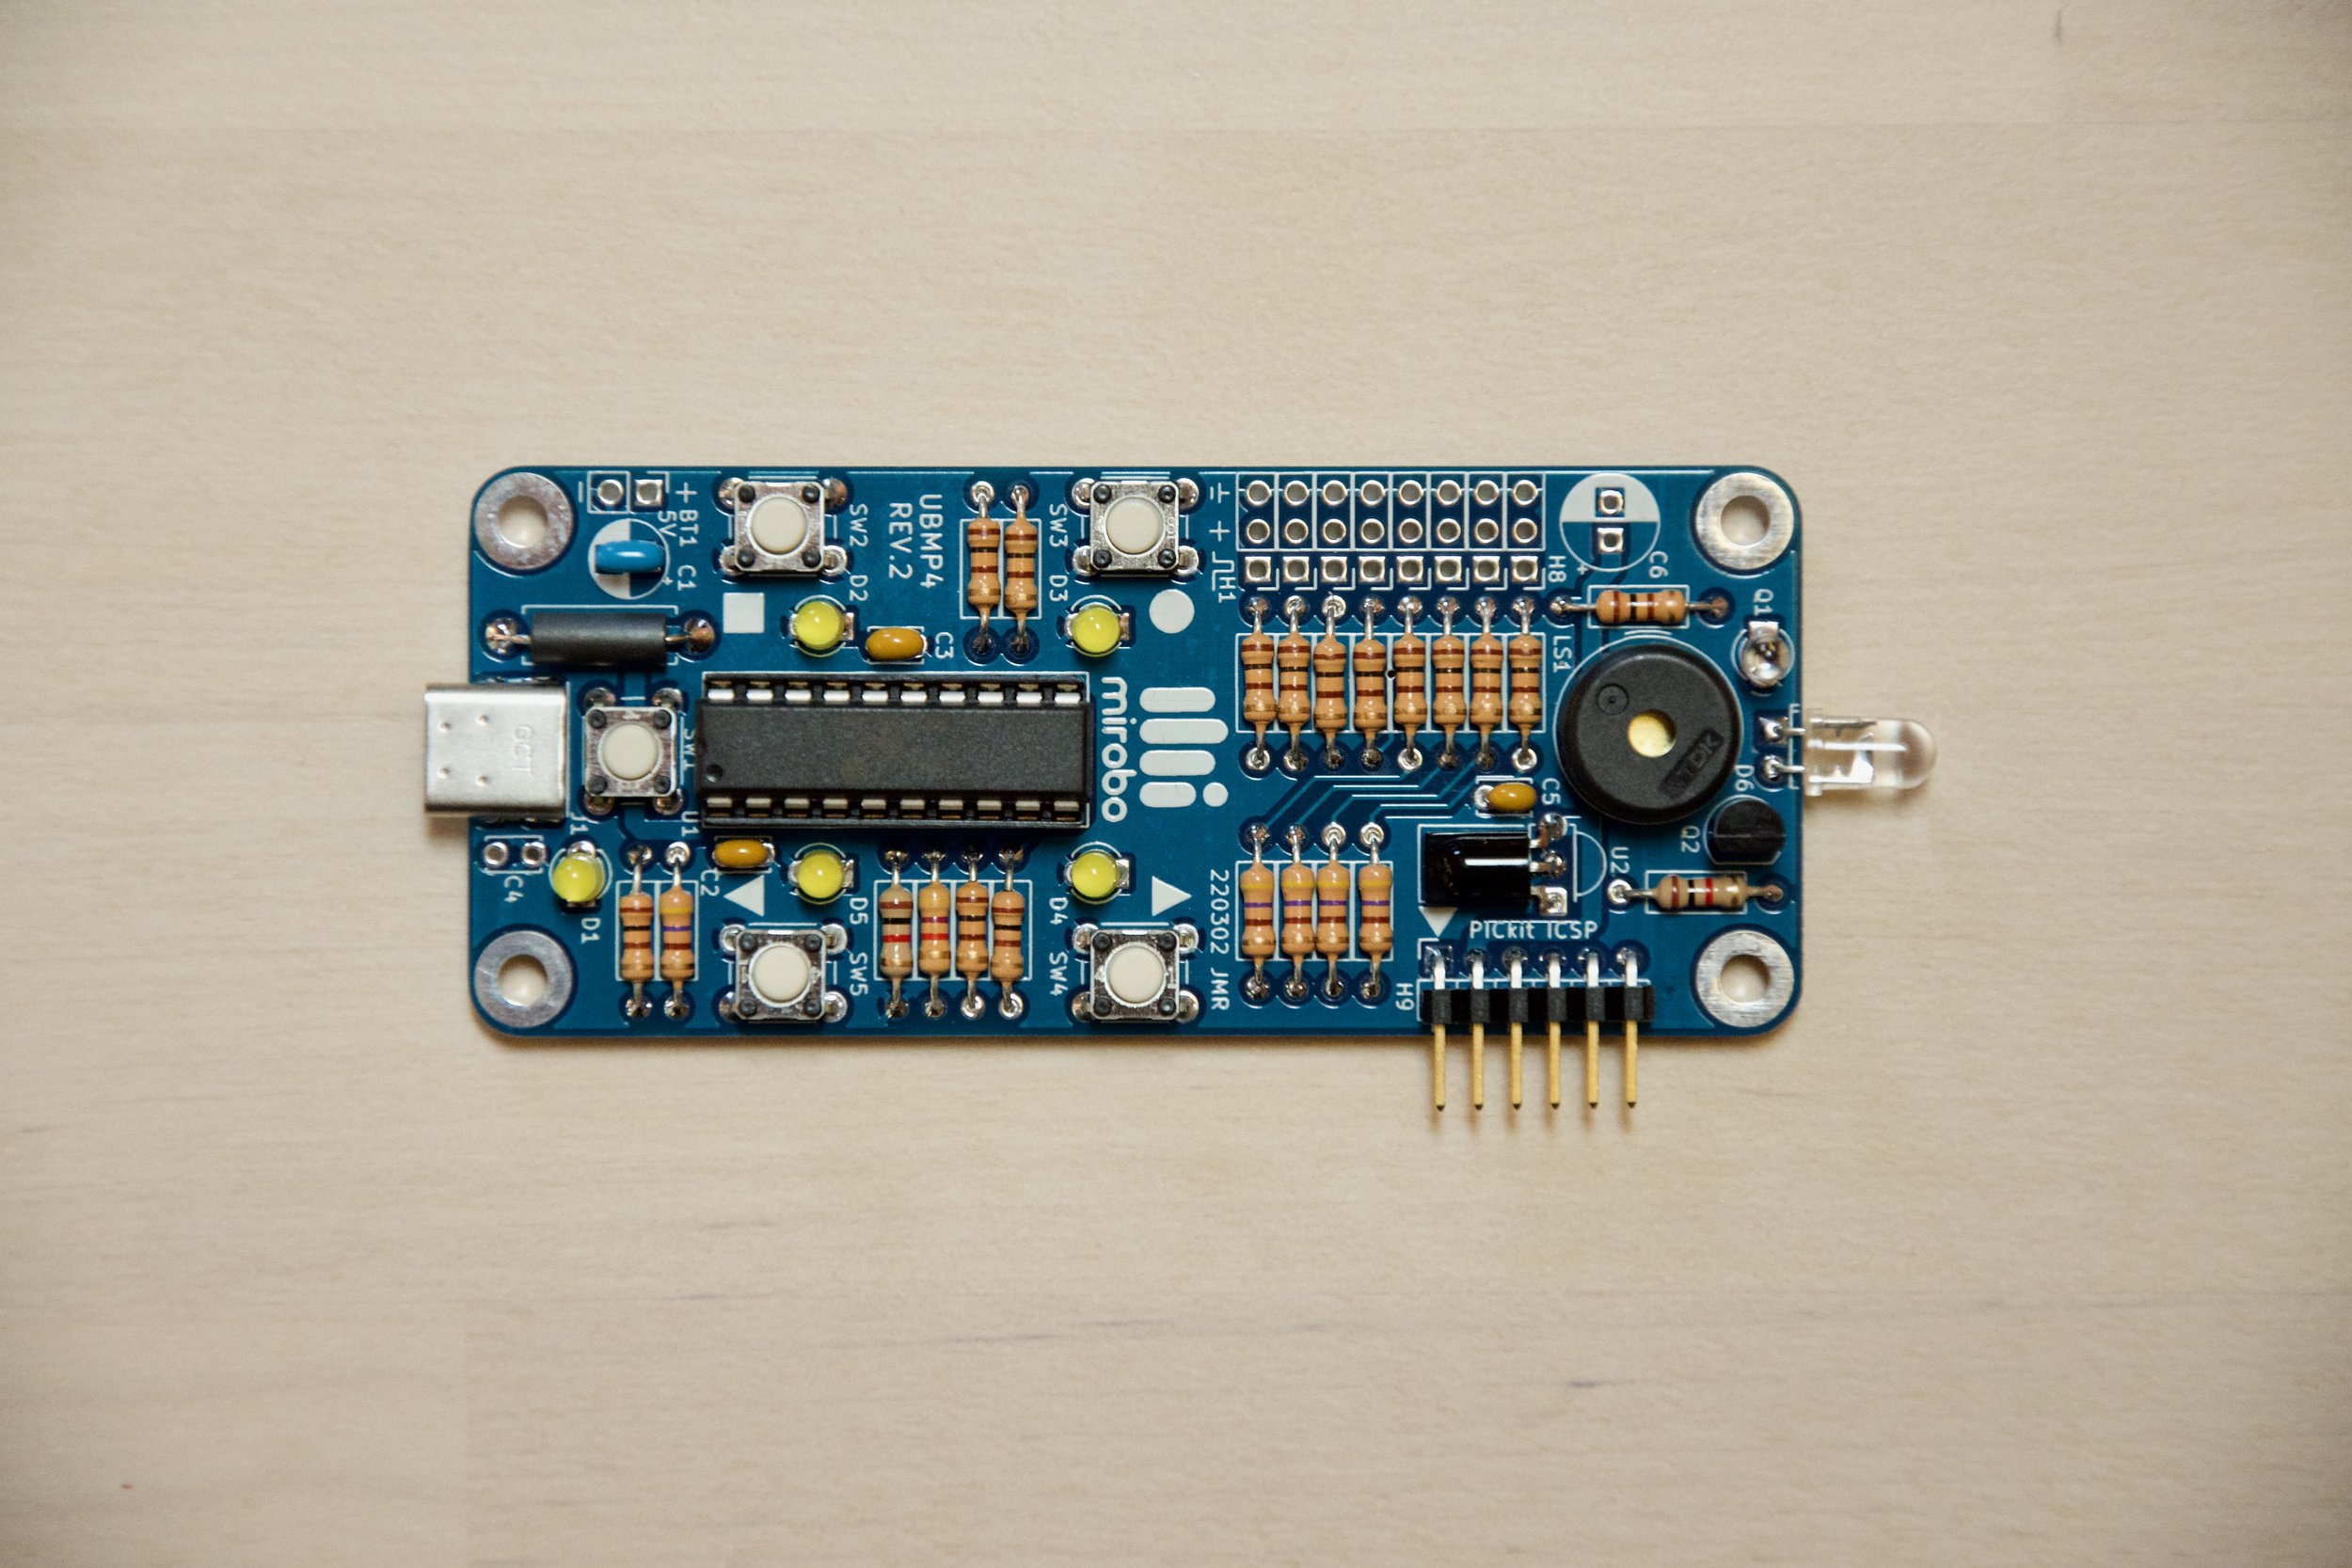
Continue learning with the same circuit after mastering the basics. UBMP4 includes five built-in pushbuttons, six LEDs, a piezo beeper, temperature and optical sensors, and an expansion header that allow learners to make a wide range of projects, from simple and self-contained to amazingly advanced.
All learning materials are open and included. Follow the step-by-step programming activities on this site to get started. UBMP4 has enough features and capabilities that you won’t quickly outgrow it as you learn.
Great for schools and maker spaces
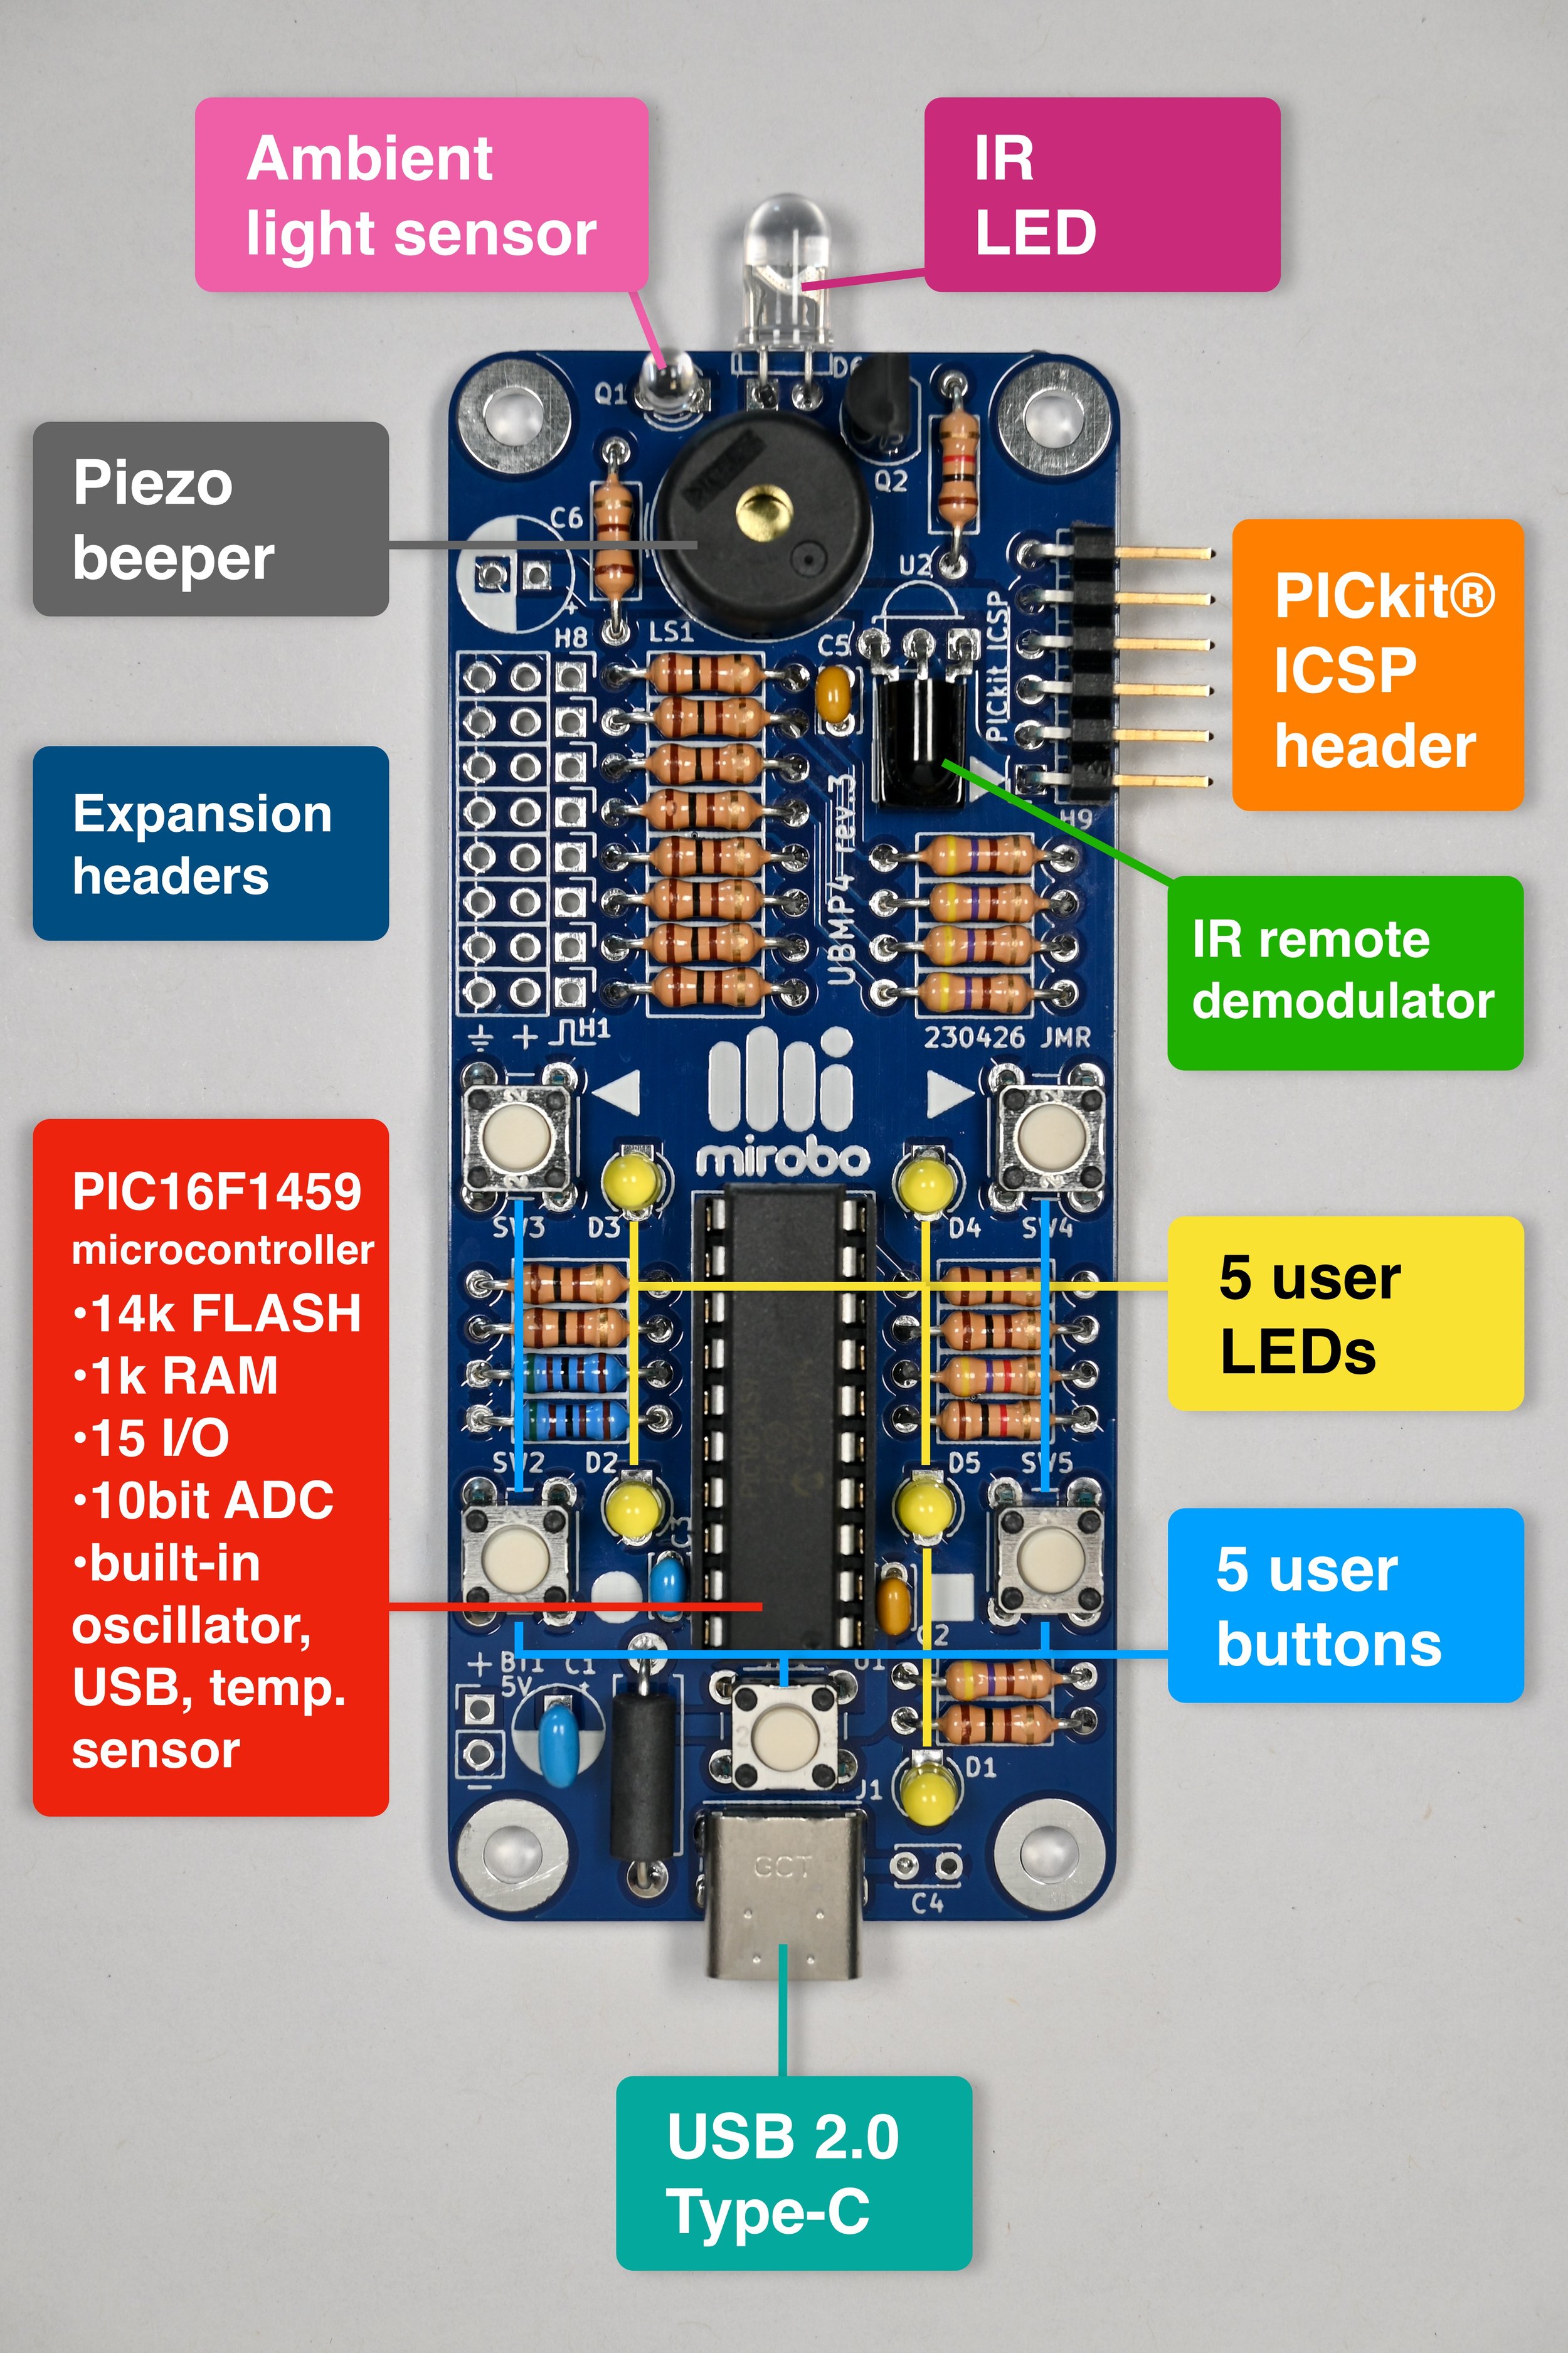
UBMP4 is designed using through-hole parts to make it easy for each learner to build their own circuit. Use UBMP4 to teach learners about electronic parts and soldering. Its open hardware design allows UBMP4 circuit boards to be manufactured in bulk to reduce costs.
Assemble UBMP4 quickly in a starter configuration, and customize it for a specific application later. All five introductory learning activities can be completed using just the UBMP4 educational starter configuration. After mastering programming concepts learners can add selected parts for specific projects, minimizing component costs, and instructors have the flexibility to adapt UBMP4 for different projects, skills, ability, or grade levels.
Combine UBMP4 and CHRP4 for more flexibility. UBMP4 and CHRP4 utilize identical circuits and curriculum activities, enabling students in the same class to create a variety of differentiated projects that instructors can easily support with common lessons and a small component inventory.

Five slightly different UBMP4 configurations including (top-bottom): a minimal educational starter configuration, a servo or NeoPixel driver board with one installed header pin, an IR transmitter with an IR LED, a room/locker alarm with LED and phototransistor, and a full build with an ambient light sensor, an IR LED, and an IR demodulator installed.
Learn real programming
Schools can use Microchip’s free MPLAB® Xpress cloud-based IDE for programming – even on a Chromebook! Or, install the full version of MPLAB® X and program UBMP4 using Windows, macOS, and Linux.
Both use industry-standard C code and integrate with GitHub to provide a more real-world programming experience than block-based code editors, and with more direct hardware-software interaction than higher-level languages like Python.
There are no ‘magic’ or hidden function libraries. All of the program and library code is easily accessible and editable to help learners develop a complete understanding of hardware and software interaction.
A pre-loaded bootloader makes programming easy. Plug a USB type-C cable into UBMP4 and it appears as a mass storage device on the computer – simply drag and drop compiled program files onto it. Or, connect Microchip’s PICkit™ 4 or 5 programmers to the ICSP header to exploit the full memory of the on-board PIC microcontroller.

Microchip’s MPLAB Xpress cloud-based IDE running in a web browser on a Chromebook, above, and Microchip’s MPLAB X IDE running in macOS, below.

UBMP4 is great for pros, too!
While UBMP4 was designed for beginners, it has lots of capabilities. Need a simple controller for a new project? UBMP4 can do that. Need a simple IR transmitter or receiver? UBMP4 is ready for that. Need an 8-channel servo controller? UBMP4 has expansion pins for that. Need a simple USB datalogger? Well, nothing about USB is really that simple, but UBMP4 has the ability to do that, too. You’ll find that UBMP4 is a very versatile system with a basic, but incredibly capable USB-connected microcontroller.
Learn it.
Start with the kit and learn about electronic parts and circuits by assembling UBMP4 yourself, or jump right into programming by purchasing UBMP4 pre-assembled. Use UBMP4’s built-in I/O circuits to learn C or assembly code programming as you make programs to read pushbuttons, sense light levels and temperature, or output light and sound.

Master it.
After learning the basic programming concepts, use UBMP4’s additional built-in hardware to develop new programming techniques and refine your skills. Some of the projects you can make using the built-in I/O circuits include a Simon-style memory game, a room or closet/locker alarm, an 8-bit music player, and an infrared remote control transmitter.

Expand it.
Add external devices to expand your UBMP4 even further. Connect R/C hobby servos to make animatronics or robotic manipulators, SONAR modules for distance sensing, NeoPixel addressable LEDs for cool lighting projects, and more. Learn how to build our own libraries for these devices so you can expand your learning as you expand your board!
Project Starters
Locker/Room alarm
Memory game
Advanced Coding
IR receiver
LCD display
UBMP4.3 schematic

Open or download a larger UBMP4.3 (.pdf) schematic diagram.
UBMP4 hardware features
Microchip PIC16F1459 USB-capable microcontroller with 8k words of program FLASH (6k words free when using the USB bootloader), 128B of user FLASH, 1kB of RAM, 10-bit ADC, and a built-in temperature sensor
5 built-in pushbuttons
5 visible light LEDs
1 piezo beeper output
optional 8-pin header for PORTC I/O pin expansion (great for servos, a SONAR module, NeoPixels, an LCD, etc.)
optional IR LED output for remote control transmitter applications (or a high-current transistor-driven output)
optional IR demodulator for remote control decoding
optional IR phototransistor or visible-light ambient light sensor for light sensing
USB 2.0 type-C port for power and programming
6-pin ICSP (In-Circuit Serial Programming) header for PICkit-4
UBMP4.3 resources
UBMP4.3 schematic. Get the KiCad design files.
UBMP4.3 parts list (.csv), or shared DigiKey UBMP4.3 parts list.
3D-printable bottom covers (.stl – 3 designs).
USB µC bootloader and UBMP4 programming
PIC16F1459 microcontrollers included with UBMP4 kits are pre-programmed with the compact, assembly code version of the open source USB µC bootloader. When connected to your computer through its USB-C connector, the USB µC bootloader allows the microcontroller in UBMP4 to appear in the computer’s file system as a mass storage device. Programming UBMP4 is as simple as dragging and dropping the compiled .hex file onto the PIC16F1459 drive representing the circuit on your computer. The program starts running as soon as the .hex file is transferred.
UBMP4 programs can be developed in C or assembly code using Microchip Technology's MPLAB X IDE or the MPLAB Xpress cloud-based IDE, or in any other programming language or IDE that creates a Microchip-compatible .hex output file. The on-board PIC16F1459 microcontroller can can also be fully programmed and reprogrammed by connecting a user-supplied PICkit 4 or PICkit 5 programmer to the optional ICSP (In-Circuit Serial Programming) header on UBMP4.
UBMP4.2 (previous version) resources
UBMP4.2 schematic. Get the KiCad design files.
UBMP4.2 parts list (.csv)
All current programming activities work with UBMP4.2.
UBMP4.1 (old version) resources and Introductory Activities
UBMP4 is open hardware and uses open source software.
We would, of course, love it if you ordered UBMP4 boards from us, but in our mission to help more people learn electronics and programming we decided to make UBMP4 completely free and open. Releasing UBMP4 as open hardware allows schools or maker spaces to download the UBMP4 printed circuit board files and have circuits fabricated at lower cost through bulk orders or via sponsorships, as well as enables end users to customize the UBMP4 design to suit specific applications. We’d love to know what you’re doing with UBMP4!
The following permissions and conditions apply to any use of UBMP4:
UBMP4 KiCad files stored in GitHub are open hardware and are licensed under the terms of the MIT license (except the mirobo.tech logo), meaning the circuit can be modified for specific needs and the fabrication files are freely available
CHRP4 programs stored in GitHub are open source software licensed under the terms of the MIT license, so anyone is free to use and modify the programs and programming examples for their specific purposes
CHRP4 learning materials on the mirobo.tech website are licensed under the terms of the Creative Commons CC-BY 4.0 license and can be re-mixed as needed
the USB µC bootloader is open source and licensed under the terms of the GPL3.0 license by John Izzard
the mirobo.tech logo mark is a trademark of mirobo Technolgy and may not be used without prior permission
UBMP4 FAQ
What’s new in version 4.3?
5.1kΩ pull-down resistors have been added to the USB-C configuration channel (CC1, CC2) pins to enable power delivery of 5V at up to 3A through a USB-C cable. The hardware is otherwise identical to version 4.2.
What’s new in version 4.2?
Not much. Hardware references (the part names, e.g. - LED2) have been refactored to make them more logical. (The original UBMP parts were named to match an older CHRP board that is no longer in use.) The biggest change is that LED references on version 4.2 now match the adjacent switch references, so LED2 is beside SW2 making programming easier. (Note that none of the microcontroller connections have changed, so un-modified UBMP4.2 code will work exactly the same in UBMP4.1).
In addition, some components have been moved slightly so that the board fits more easily into 3D printed cases. Oh, and the PCB is no longer black, it’s blue!
How is UBMP4 programmed?
UBMP4 programs can be written in C or assembly code using Microchip’s free MPLAB-X desktop IDE (available for Linux, macOS, and Windows), or the cloud-based MPLAB Xpress IDE which currently works in a web browser – it even works on Chromebooks!
Compiled programs are downloaded into UBMP4 over USB, without any additional hardware required, using an on-board bootloader program. UBMP4 appears as an external mass storage drive on your computer – just drag and drop your file on it to run.
Building a bare-board UBMP4 requires Microchip’s PICkit-4 programmer (or any other programmer supporting the PIC16F1459 microcontroller and, optionally, Microchip’s ICSP In-Circuit Serial Programming capability) to pre-load the USB bootloader into a blank PIC16F1459 microcontroller. If you don’t have a PIC programmer, you can purchase a microcontroller pre-programmed with the USB-µC bootloader from us.
Is UBMP4 an Arduino?
No, CHRP4 is not an Arduino, nor is it programmed using Arduino software or development tools. Arduino code is similar to the C language code used to program UBMP4, but Arduino programs will not run in UBMP4. Please see our ARPS circuit if you are interested in making Arduino-based projects, including robots.
Why would I use UBMP4 instead of an Arduino, Raspberry Pi Pico, ESP32, or [insert your favourite embedded device here]?
The UBMP4 circuit includes built-in input and output devices to enable users to learn introductory coding without needing to add any external breadboards, components, carriers, hats, or shields. The microcontroller in UBMP4 was chosen for its simplicity, versatility, low cost, and availability in a DIP package, which allows learners to economically assemble their own, integrated and fully-functional circuit board, both for learning and as a complete, stand-alone project – something that is a lot more difficult when working with breadboards or multiple, external circuits or modules.
Programming UBMP4 using industry-standard C code adds some programming hurdles for new users, but we think programming a microcontroller-based hardware circuit like UBMP4 using C in a fully-featured IDE (including GitHub integration) unlocks the full potential of the hardware and provides computer technology learners with fewer software limitations than using simpler block-based languages (which are great for introductory, or more general STEM/STEAM instruction), or higher-level languages like Python (better suited for higher-level software-based tasks as opposed to hardware control).
What kind of USB-C cable do I need to connect to UBMP4?
UBMP4 uses USB 2.0 type-C connector, so you can use a USB-A to USB-C cable (commonly available as a phone charge and sync cable), or a UCB-C to USB-C cable rated for USB 2.0 speeds or above. UBMP4.2 doesn’t include the USB configuration resistors to enable power delivery over USB-C and requires the use of a USB-A to USB-C cable or adapter.
My computer only has USB-C ports, why doesn’t UBMP4.2 appear as a storage device?
Use a USB-C to USB-A adapter to connect from your computer to UBMP4 through a USB-A to USB-C phone-style charging cable. Yeah, we know its kind of strange going from USB-C to USB-A just to go back to USB-C again, but it works!
PIC®, PICmicro®, and MPLAB® are registered trademarks of Microchip Technology Inc., in the U.S.A. and other countries. USB Type-C® and USB-C® are registered trademarks of the USB Implementers Forum. PICkit™ is a trademark of Microchip Technology Inc. Arduino® is a registered trademark of Arduino AG. Other products mentioned are trademarks of their respective owners.